
Touchscreen control has been discontinued.
Custom templates in touch screen presentations
With Repeat Signage, our Banner control supports the combining of templates with databases. This is supported in both non-touchscreen and touchscreen modes. This is a quick overview of how this works.
The starting point is using a database. A database can be either a CSV file, XML file, Microsoft Access database, ODBC database or Microsoft SQL Server database. We are going to use a Banner RSS feed as an example, which is effectively a list of titles, descriptions and pictures. There can be created and hosted free of change at www.repeatserver.com. The address of our feed is:
https://www.repeatserver.com/Users/RepeatSamples/museum.xml
This contains just 4 records.
Walk through:
1. The first thing we have to do is to add this as a data source to Repeat Signage. The easiest way is on the main Repeat Signage screen using the Data connection manager:

and then use the 'Add' button on the screen that appears to add the data source. In this case our data source is an XML file, which is on a website:
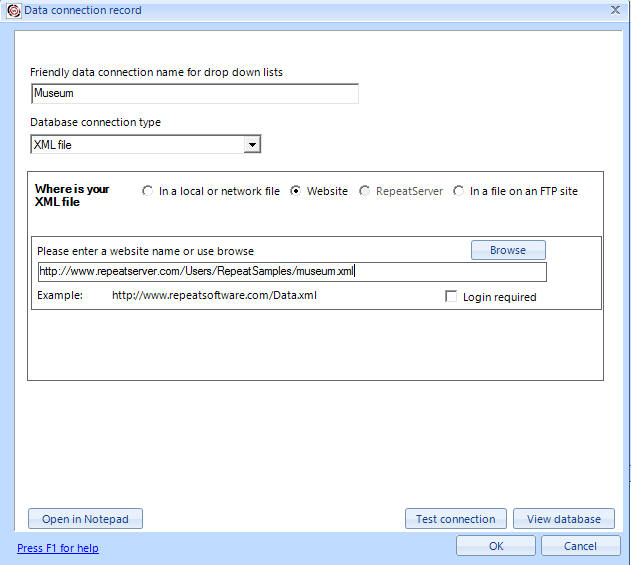
Click the 'Website' option, then type in/ copy and paste in:
https://www.repeatserver.com/Users/RepeatSamples/museum.xml
and put in a friendly name of 'Museum' and then click on 'Test connection' (which you will need an active Internet connection for) and then click on 'OK' to save the data connection.
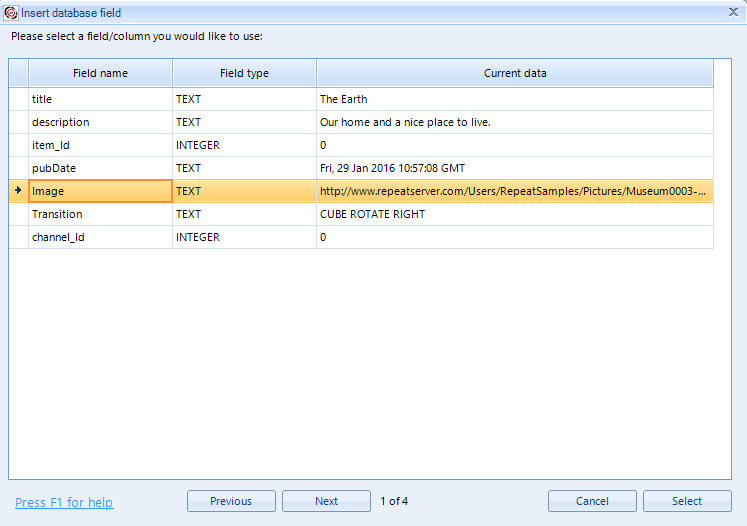
You can then use the Connect button to use the Database Viewer. Look at the 'Item' table and preview the data:
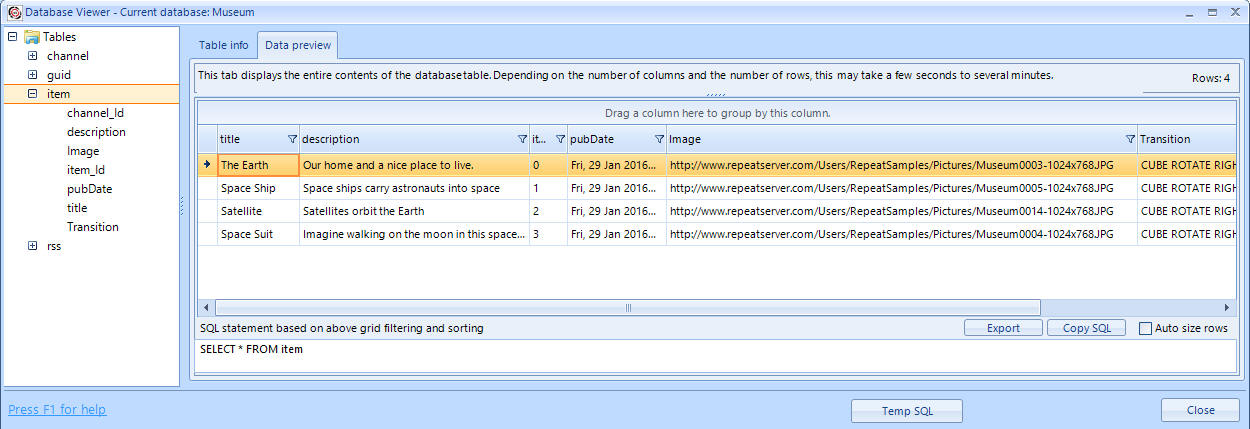
So the Item table contains a number of database fields:
title
description
pubDate
Image
Transition
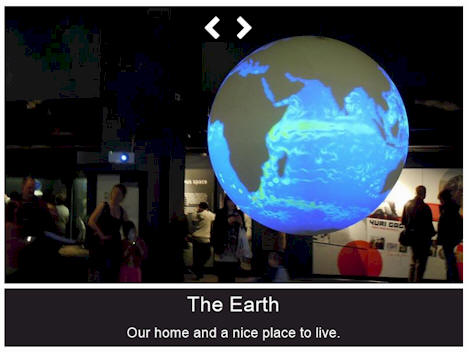
The Image field contains a full website address of the image files, such as:
https://www.repeatserver.com/Users/RepeatSamples/Pictures/Museum0004-1024x768.JPG
The above picture looks like:

So we now have a database ready to use.
2. Close the Data connection manager and return to the Repeat Signage main screen. Database custom templates are a feature of the CORPORATE and MEDIA WALL editions, so you will need to change the 'Select trial version' combo to the CORPORATE EDITION TRIAL:

3. Next, go to the Touch tab and then click on 'Create touch presentation'
.
4. Click on 'Next', 'Next' and 'Create' to create a new blank presentation.
5. The designer screen will load. Now double click the touch screen area in the middle and select the BANNER01 option:
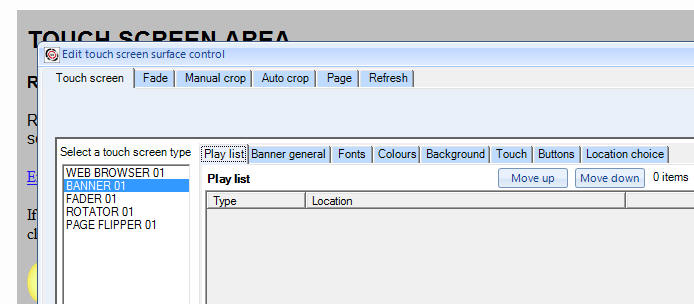
6. Change to the 'Location choice' tab and select 'Collect play list from a database and use a custom template:

7. Go to the 'Select database' tab and click on the 'Add' button and then select 'Select data collection from this systems data connections':
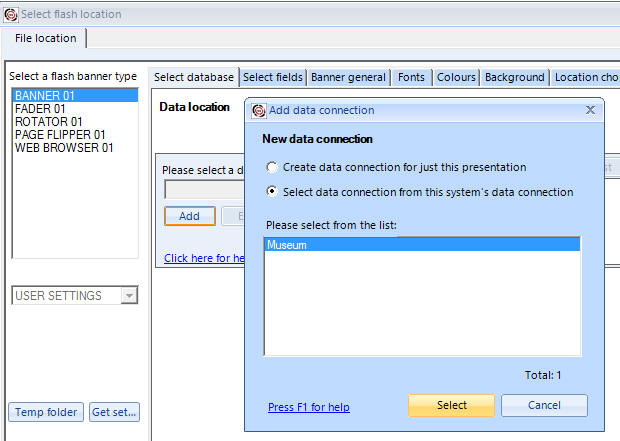
and choose the 'Museum' one we set up in the first step and click on 'Select'.
8. Now use the 'SQL Wizard' button to launch the wizard:
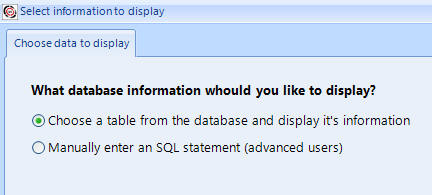
9. Keep the 'Choose a table from the database ...' option and click on Next.
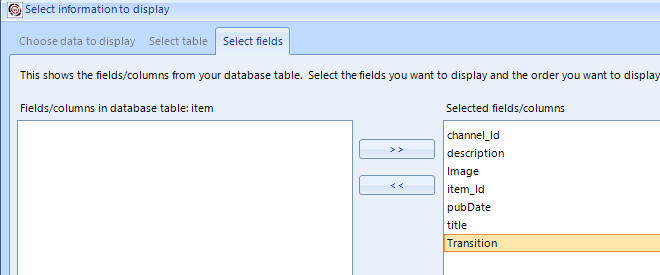
10. Click on the 'Item' table and click on Next.
11. Use the 'Add all' button to add all the fields in this database table to the list:
12. Click on Next and then Finished on the final screen. This will then return you to the 'Select database' tab and an SQL statement will have been generated for you:
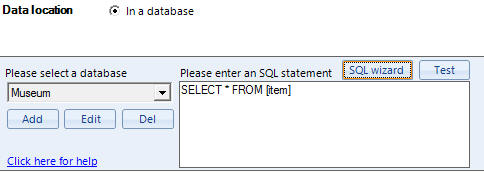
We have now told Repeat Signage which database information we want. Next job is to set up a custom template to display this information with.
13. Click on the 'Custom template' tab which will tell us that our template is blank. We are going to choose a template using the template wizard to get started quickly. Click on the template wizard button.
14. Select 'Adverts' then 'Advert03-43':
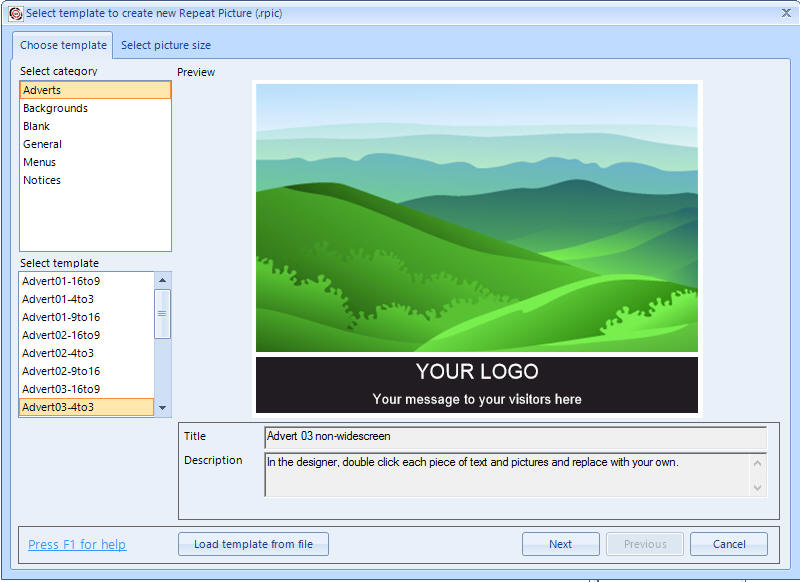
and then click on 'Next'.
15. You can now select the number of pixels for your template. For this demonstration we will use the 1024x768 pixels that this template defaults to and then click on the 'Create' button.
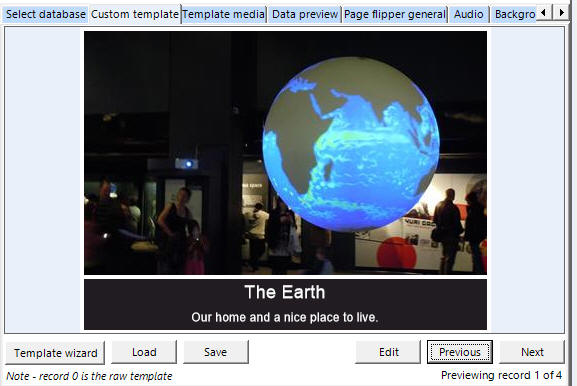
16. Your template will be returned to the Custom template tab:
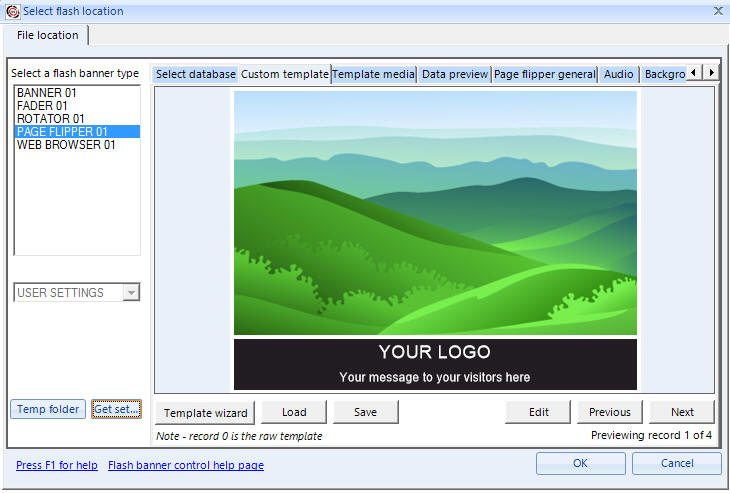
17. Look at the above image. It says 'Previewing record 1 of 4' in the corner. Click on the Previous and Next buttons to move between the 4 records in this database. You will notice that nothing changes. We just have this template but we don't have any links to our database inside it. What we need to do now is to edit the template and instead of the picture, we need to point this as the 'Image' field in our database, so that the image for each record is collected. We also need to change the 'YOUR LOGO' text to point at the 'title' field in the database and the 'Your message to your visitors here' to the 'description' field.
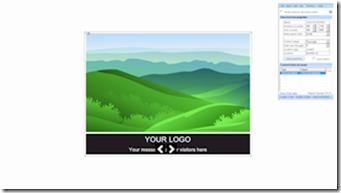
So click on the 'Edit' button to option the customer template designer:
18. Double click on the picture control to open it's properties:
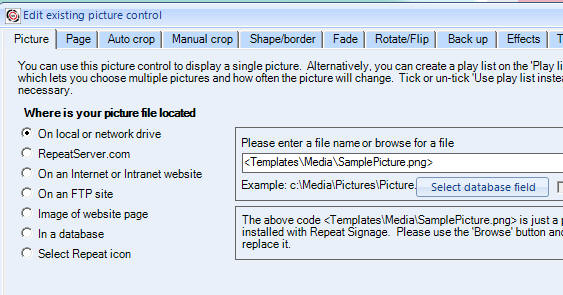
19. Click on the 'Select database field' button and then select the 'Image' field:
which is the one that contains the location of the pictures. Then click on 'Select' or double click the Image field to return to the previous screen:

The field name <IMAGE> has now been inserted for you and you just need to click on the OK button to save:
20. Now double click on the 'YOUR LOGO' text to open it's properties.
21. Use the 'Select database field' button to select the 'title' field:

and click on OK to save.
22. Now double click on the 'Your message to your visitors here' text to open it's properties and select the 'description' field this time and then click on OK.
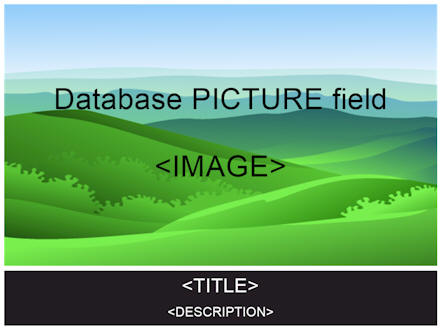
Your final template should look like:
You can see that the picture now tells you it is a 'Database PICTURE field' called <IMAGE>. You also have the field name <TITLE> and <DESCRIPTION> in the text fields.
23. Click on 'File' then 'Exit' and save your changes to return to the previous screen:
You will see that the first record has changed to display the database contents and you can use the Next button to look at the other records. If you go to record 0, then this displays the raw template.
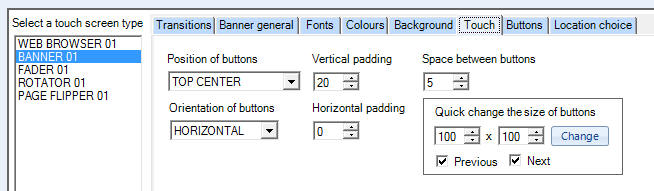
24. Because this is a touch screen presentation, we just need to specify the location of the touch screen buttons. Scroll the tabs to the right until you find the Touch tab and then set the options below to TOP CENTRE and a vertical padding of 20:
25. All finished. Now click on the 'OK' button to insert your Banner control into the presentation.
25. You can resize this as necessary within your presentation. Just remember to keep the same shape as the template, i.e. 4 parts wide to 3 parts high like:

26. You need to preview the touch screen presentation to see how the navigation will work for your users. On the menu, click on 'View' then 'Preview touch screen':

and read the information on screen. Then click on the 'Preview' button.
27. Use the two top arrows to move between records. The default transition is CUBE ROTATE RIGHT. We can select another transition later.
28. Click on the red top left cross to close the preview and return to the designer.
29. Double click your control to open the properties again and we will just look at a few options.
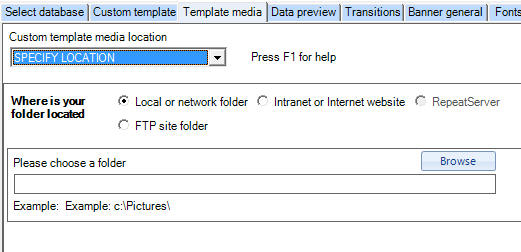
30. Click on the 'Template media' tab:
In our database, the Image field contained full addresses to the picture files, such as:
https://www.repeatserver.com/Users/RepeatSamples/Pictures/Museum0004-1024x768.JPG
If your database only had the names of the pictures, such as 'Museum0004-1024x768.jpg' then Repeat Signage wouldn't know where to find the pictures. You can use this tab to tell Repeat Signage where to look for Pictures, PDF's, or other media referenced in your database
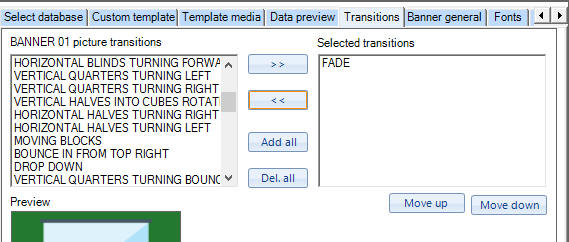
31. The 'Transitions' tab (which just appears if you are on the BANNER 01 option) allows you to select the transition or transitions you want to use with your records. Remove the CUBE ROTATE RIGHT and replace it with FADE instead:
32. You might want to play with the design or positions of the touch buttons as well using the Touch and Buttons tabs. You can press F1 for more information on any of the tabs on this screen.
33. Save your touch screen presentation when you have finished playing.
Additional notes
The above shows you how to use a database with the touch screen area. You could make the touch screen area full screen and use a template designed the same shape as your screen, i.e. a widescreen template for a widescreen screen. With touch screen presentations, you can make the touch screen area smaller and use other controls around it such as RSS news scrollers, logos, clocks, etc.
Help and support
We are happy to help you connect your database to Repeat Signage and create custom templates. Please email us as support@repeatsoftware.com if you require any help.
A modified version of this walk through for non-touch screen presentations is available here.