
Note - This is a step-by-step quick start tutorial. However, you can also use our free online training videos which will demonstrate basic and more advanced features visually.
Repeat Signage play lists
A play list is a list of Repeat Signage presentations you want to play and when they should be displayed. There are several Play list types you can choose from including CONTINUOUS, HOURLY, DAILY, WEEKLY and DATES. Please read Play list types to see the differences between them.
IMPORTANT - Play lists are only available in the Standard and above versions of Repeat Signage. If you are using the trial version, then on the main Repeat Signage screen make sure you have 'STANDARD EDITION TRIAL' selected.
In this tutorial, we are going to schedule a few of the Sample presentations, included when you install Repeat Signage, to display over a single day by using a DAILY play list. This allows you to schedule presentations within a 24 hour period so that different presentations play at different times through out the day. At the start of each new day, the same 24-hours of presentations start again.
Creating your first play list
Before you start, then you need to create two presentations so that you can schedule them
1. Open Repeat Signage by clicking on the Windows Start button (Windows 10 /11), then 'All programs' then 'Repeat Signage V5' then 'Repeat Signage V5'. Alternatively, use the Windows Desktop icon.
2. From the main Repeat Signage screen, click on the 'Play lists' tab and then click on the 'Create new play list' button.
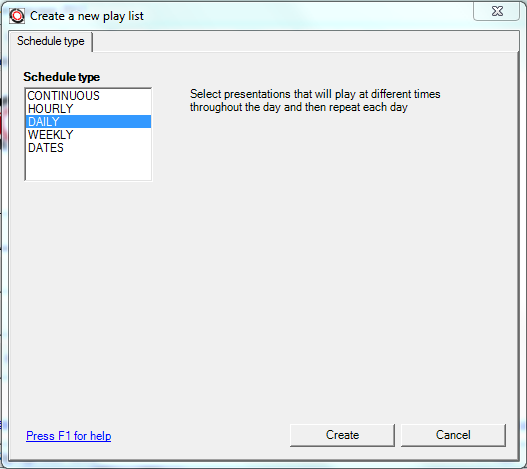
3. Select 'DAILY' and then click on the 'Create' button.
4. Let's just have look at the layout:
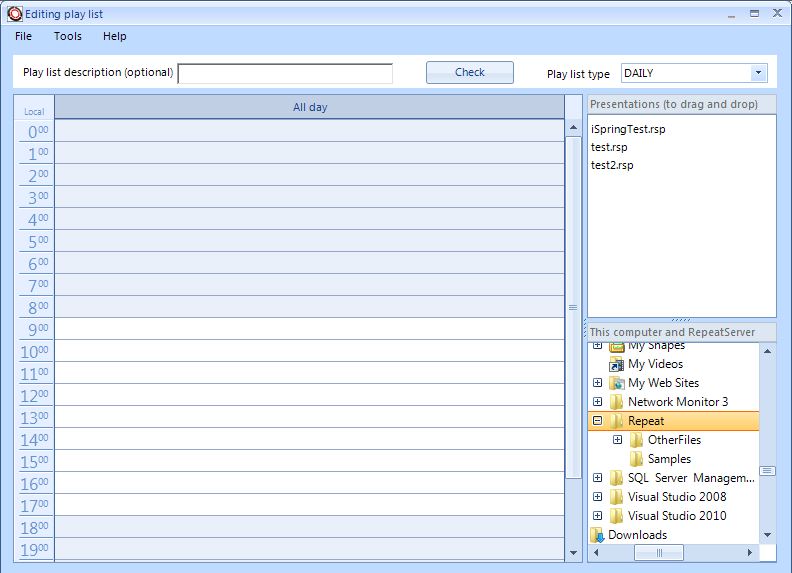
- First thing to notice is the top right corner where it says 'Play list type' which is currently set to 'DAILY'. This drop down list allows you to change the Play list types to either CONTINUOUS, HOURLY, DAILY, WEEKLY or DATES. If you change this to any of the other types, then the grid in the middle left changes. Currently, because we are in DAILY mode, then the left side is showing times starting at 0.00 to 19.00 (Midnight to 7pm). If you scroll down using the scroll bar to the right of the grid then you will see the end at 23.00 (11pm). The grid is therefore split into 24 1-hour grid blocks.
- At the right side of the screen, middle top, is a section entitled 'Presentations (to drag and drop)' and underneath is a list of Repeat Signage presentation times. This may be blank if you haven't created any yet. This shows all the Repeat Signage presentations files in the currently selected folder, which leads us to the area below that called 'This computer and RepeatServer'. This shows the folders on your current computer and defaults to the default Repeat Signage data folder for the current Windows user. You can use the up/down and left/right scroll bars in this section to find and select other folders.
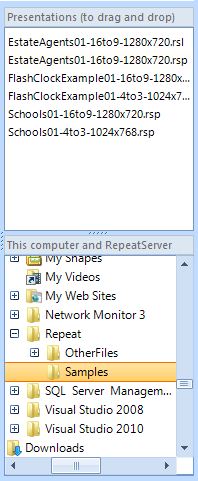
5. If you haven't changed the default Repeat Signage data folder in Repeat Signage, then the 'This computer and RepeatServer' grid should be on the 'Repeat' folder. Please click on the 'Samples' subfolder which will then display a list of presentations in the 'Presentations (to drag and drop)' section:
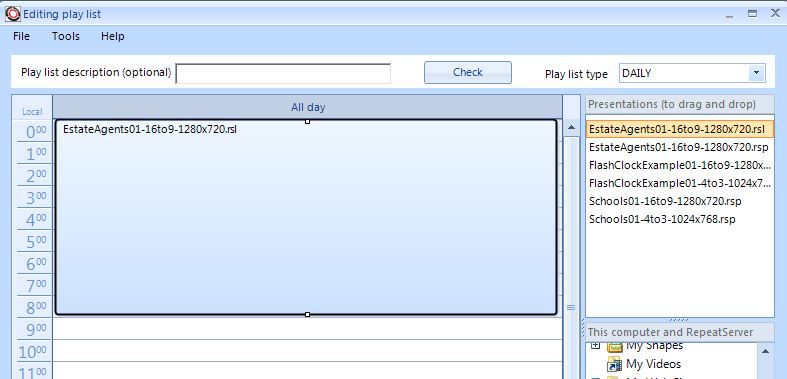
6. You should see the 6 sample presentations in the top of the 'Presentations (to drag and drop)' area (these may be different as the installation package has presentations added or removed over time). Please click on 'EstateAgents01-16to9-1280x720.rsl' which will highlight it in orange. (This is an example, as the Estate Agents edition of the software is now discontinued). Then, holding down your left mouse button, drag this presentation to the top grid cell (which as 0.00 to the left) and release the left mouse button to create the task. Your screen should look similar to:
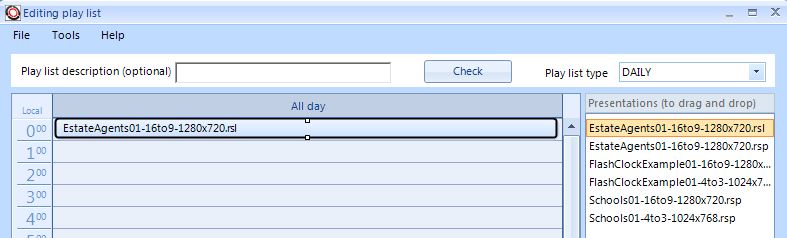
What you have done is to schedule the 'EstateAgents01-16to9-1280x720.rsl' sample presentation to be played from 0.00 (midnight) until 1pm in the morning.
7. We want to now is to change this task so that it plays from midnight until 9am. To do this, then click on this task in the grid and if you look in the above picture of the highlighted task next to 0.00 then you will see it has two small white blocks in the middle. These are resizer handles and if you click on the bottom one, hold down your left mouse key and drag down, it will change the size of the task. Resize this down to the end of the 8.00 block:
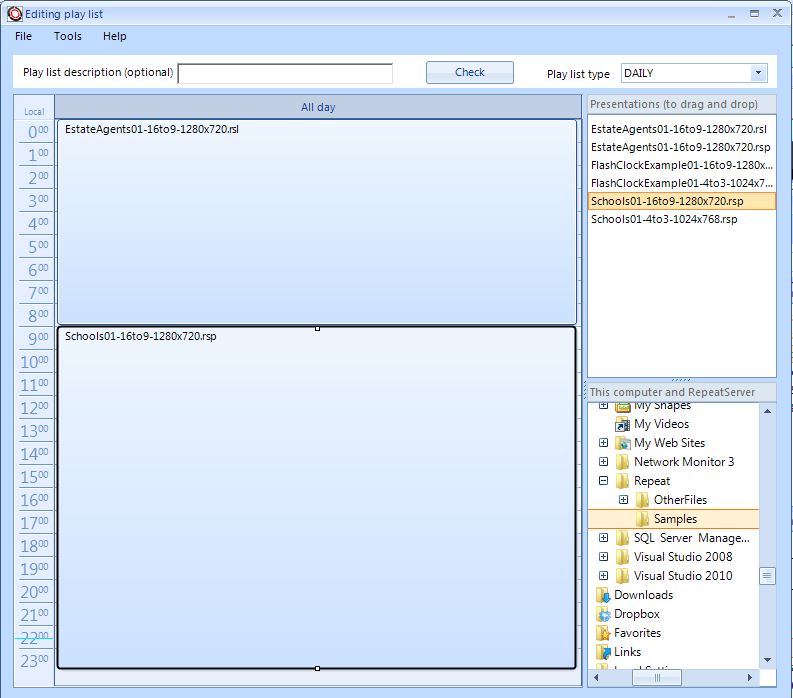
8. What we want to do now is to schedule presentations to cover the entire 24-hour period. We can only see until 1900 at the bottom of the grid, so let's maximize this screen (to make it full screen) so that you can see the entire grid down to 2300 at the bottom.
9. Now drag and drop the 'Schools01-16to9-1280x720.rsp' presentation from the 'Presentations (to drag and drop)' to the 9.00. Then resize this all the way down to the bottom of the grid. You should now see:
10. We now have this DAILY play list with presentations that cover the entire 24-hour period. We are only scheduling two presentations for this example, but hopefully you get the idea. Now we need to save this play list file. Now click on the 'Check' button in the top middle of the screen. As long as you have dragged both presentations to fill the entire grid, you should get a 'No problems found' message displayed and you can click on 'OK' to close this.
11. Now save this play list. On the menu, click on 'File' then 'Save'. You will be prompted for a file name. Enter 'FirstPlayList' and then click on 'Save'.
12. Whilst you are here, press the F1 key on your keyboard to bring up the help page for the play list screen. This gives more information on creating, moving, copying, resizing and deleting tasks. It also tells you how to change the rule scale. In the example above, we are just scheduling tasks for complete hours. You can right mouse click the ruler and change the scale to 5 minutes, for example.
13. Close your presentation by going to the menu and selecting 'File' then 'Exit' to return to the main Repeat Signage screen.
Next - Playing your first play list
Note - With Repeat Signage V5, you can also schedule a time to shut down your computer. For example, your screen may be in a shop windows and you may want to shut down the digital signage display at 10pm each night. You can schedule a 'SHUTDOWN COMPUTER' task by double clicking a blank time area and then using the 'Shutdown computer' button instead of choosing a presentation.