
Controller
| Supported file types | N/A - This is designed to synchronise play lists of other controls |
| Playlist support | Yes |
| Scheduler support | No |
| Scrolling support | No - This is a non-visual control - It is not displayed on screen |
| Rotation support | Not applicable |
| File locations | N/A |
| Editions | This is available In the Standard and above editions |
| Training videos | Repeat Signage Controls - Controller control (03:18 min/secs) |
Description
Each type of control in Repeat Signage, such as the Text label or Picture control operates completely independent from all the other controls. They can be static, have playlists, or allow media or text to be scheduled to appear. So if you have 10 items in a Text label play list and 10 in a Picture control play list, you may want them to both change at the same time every 5 seconds. Before this Controller control, then these two would quickly become out of sync with each other.
What the controller does is allow you to set up a controller play list which then tells one or more other controls (it's 'slave controls') when to display their next play list items on screen. So back to the 10 items in a Text label playlist and 10 in a Picture control playlist, this controller would sync the timings of both controls so that the correct text would be displayed against each picture.
Note - When designing a presentation and you insert a Controller onto the screen, you will see a traffic light symbol:

This allows you to interact with your controller so that you can double click it to set up and modify your playlist. When you play your presentation, this is not shown.
Other controls that can be used with the Controller
You can use all the controls with the Controller except the Banner using the 'BANNER 02' option, RSS and video controls. The reason for this is that these controls use their own internal play lists. You can use the Banner using the 'FADER 01' option, which is designed for high performance fading of images.
Having said that, all of these controls can use our play list feature. So for example, you can have a RSS play list so that is plays one RSS feed and then you can get the controller to change this to a different RSS feed. You can do the same with the Banner using the 'BANNER 02' option and video controls.
Using the controller
1. Before you can use the controller, you will need some existing controls on screen that have been set up to use a playlist. If you are testing, we suggest that you create a Text label control and set up a playlist. Instructions on how to do this are can be found by clicking here at the 'Playlists of text and text files' section. Then set up another playlist control such as a Picture control with a playlist. Instructions for that can be found by clicking here under the 'Playlists of Pictures' section.
2. When designing a presentation, then on the menu click on 'Insert' then 'Insert controller'.
3. A traffic light control will be added to your presentation.
4. Double click the traffic light image to open its properties window. You should see some controls listed which use play lists. If not, then you need to go back to step 1 above.
5. Tick the controls you want this controller to use.
6. Change the tab to the 'Play list' tab.
7. Click on the 'Add' button. Make sure all your controls are ticked then click on the 'OK' button to save this.
8. Then OK again to save this screen.
What you have done is to create a simple playlist with 1 item. By default this will move all your controls to the next item in their playlists every 4 seconds.
You can create as many playlist items as you need. If you have multiple controls on screen, then you can choose which controls change when the controller fires. For example, you many have 4 picture controls. With the first play list item, you could tick all 4 controls and all of these will change on the first tick of the controller. On the next play list item you could just do controls 1 and 3, then on the next 2 and 4, so that you can create quite elaborative effects.
Controller data input modes
By default, you manually add play list items to the controller's play list. However, you can get the play list to read the play lists of it's slave controls instead and then automatically generate its play lists based on those. This is useful for large and complicated play lists. For example, say you have 6 picture controls in your presentation and want some of them changing, others staying the same, all changing together sometimes, etc, then you could end up with a lot of controller items especially if you are working to a specific plan. In this case it is easiest to set up each Picture control and add all the items in, along with when they need to be displayed, and then repeat for the other picture controls. Then use this Do play list timing data input directly on slave controls tick box, (which is on the 'Controls' tab when you double click a controller), so that this controller generates its own play list based on its slave controls and does all the hard work for you.
Editing slave controls
If you are using a controller and then edit a 'slave control' then that control's play list will be reset back to the beginning. This will mean that that control is out-of-sync with other slave controls on screen. If you want to re-sync all the controls then either open the controller to display its properties then click on the 'OK' button, or right mouse click the controller and use the 'Refresh' option.
Synchronising controls and the use of transitions
The whole point of the controller is to get its slave controls to tick onto their next play list items at the same time. However, if you have some controls that use a transition, such as fade, and that fade is set to say 2 seconds, and other controls that don't use a transition, then they will appear to be out of sync. So either don't use transitions on all controls, or use transitions but have the same transition time.
Testing your controller
If you have a long or complicated play list, then sitting and watching it play will take time. You can right mouse click the controller to show the context menu:
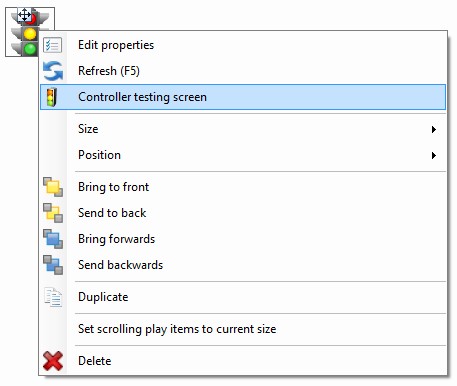
and select 'Controller testing screen'. Press F1 for help when on the controller testing screen for help on using this.
A note about performance on multiple monitor computers
If your computer system has more than one monitor and have our controls, such as the Picture control full screen on each monitor, then you may get a slight delay using the controller. We put a higher performance system in place for this type of situation after trialing the controller in a US hospital that was using a 6 screen video wall and was changing pictures on multiple screens simultaneously. The Banner control called 'FADER 01' is a high performance image fader. This controller will also control Banner controls that use the 'FADER 01' option, which is ideal for large screens changing full screen images simultaneously.