Creating menus with Repeat Pictures and the Spreadsheet control
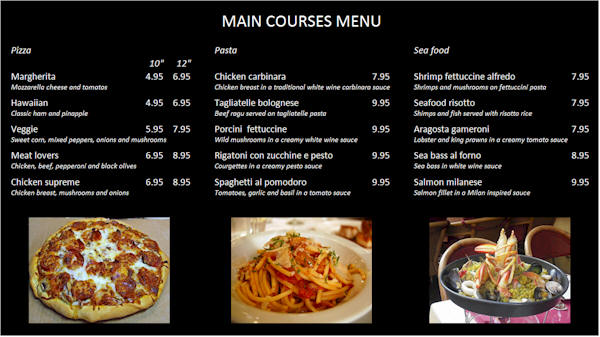
The new Spreadsheet control can be used to easily add grids of information into pictures, which you can then play with the Banner control. This is available in all editions of Repeat Signage. The menu example below is made up of a combination of a large picture and a spreadsheet grid:
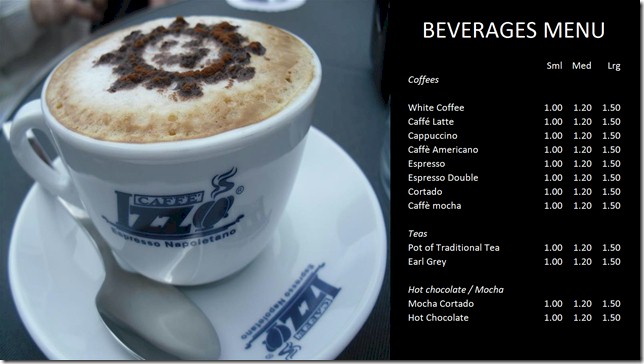
Here is a walk through of how to use our menu templates and display with the Banner control:
1. From the main Repeat Signage screen, click on 'Create' and then 'Create Repeat Picture'.
2. Click on the 'Menus' group which will show you a number of menu templates. Select 'Menu01-16to9' and click on 'Next'.
3. Select the number of pixels to make your picture. For example, if you are going to use the Banner control full screen on a True HD display screen, then you would select 1920x1080 pixels. Then click on 'Create'.
4. The template is displayed on screen in the Repeat Picture editor:
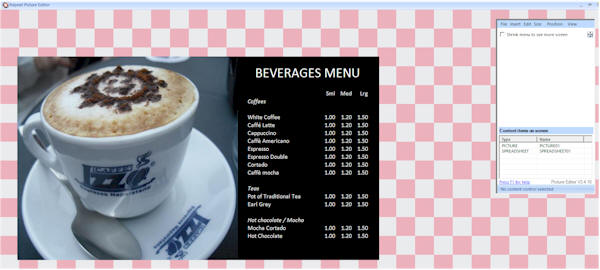
You can change the picture by double clicking it and selecting another one. You can change the menu by double clicking it. This is a 'Built-in spreadsheet' and you can then use the 'Edit spreadsheet' button to display the spreadsheet full screen and you can chance as required. It uses a familiar spreadsheet layout, and rows, columns and cells can all be individually customised.
5. When finished editing, then from the menu, click on 'File' then 'Save' and save your new picture. We are calling ours 'MyMenu01'. This will have a .rpic file extension such as 'MyMenu01.rpic'.
6. From the menu click on the 'Presentations' tab and the 'Create new presentation'.
7. Select 'Screen on this computer' and click on the 'Next' button. (Note - If you were creating a presentation for a True HD screen, you would have used the 'Screen on another computer' button and then chosen 1920x1080 instead).
8. Click on 'Create' to create a new blank presentation.
9. Your new presentation will open in the Repeat Signage designer. From the menu, click on 'Insert' then 'Banner (Pictures with text)'.
10. The screen displays a play list. Click on the 'Add' button and then use the 'Browse' button and select your menu file. We called ours MyMenu.rpic.
11. Click on 'OK' to add your file to the list. Now at the moment we just have a single menu file.
12. Click on 'OK' to add the Banner control to the screen.
13. Now right click your new Banner control and select 'Size' then 'Full screen' from the menu to make the control full screen. If your computer has a wide screen monitor, then this will look great. If your computer has a normal shaped screen then our widescreen template will look a little squashed. It's a case of matching template and screen shapes. You can always go back later and use a non-widescreen template instead.
14. You can now save your finished presentation from the File menu.
If you are using the Banner control, you need to create some more menu files, or adverts, using the Repeat Picture system. You can also double click the Banner control in the designer if you want to change the transitions between pictures and also the default time between pictures. There are 50 transition effects, such as fade, with the Banner control.
If you are just displaying a single menu within a presentation, and you don't want it moving, then you could display your MyMenu01.rpic file with our Picture control instead, so that if just stays put on screen. You can also use the Spreadsheet control to just display the menu grid within the presentation directly if required.
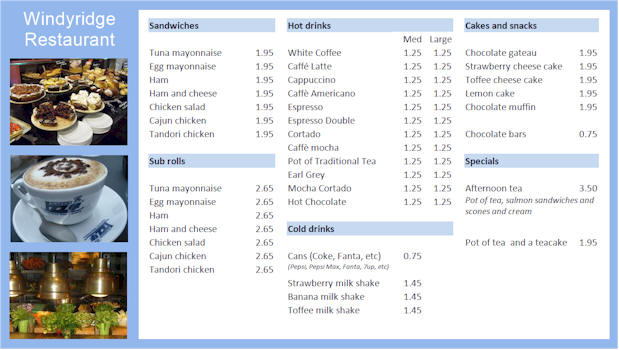
Another menu template example:
Repeat Pictures are a picture format that allows you to use pictures, PDF files, documents (MS Word and OpenOffice Writer), text files, RTF files, shapes, as well as manually entered text to create images. You design still images and then save the file which has a .rpic extension. See Repeat Pictures for more information. You can display .rpic files with this Banner control.
There are a number of templates included to help get you started, and we will be adding more in 2015:
