
Data grid tab
This tab allows you to set general options for your data grid control.
Show column headers - Whether or not to display headers at the top of the data grid columns.
Column size mode - Current choices are MANUAL or SPREAD EVENLY. MANUAL allows you to specify the width of each column in pixels, so that you can display the column exactly as required. You can set individual column widths on the 'Columns' tab. SPREAD EVENLY displays all the columns in your list evenly across the data grid.
Show header border - Show or hide the border around the headers.
Show cells border - Show or hide the border around the cells in the grid.
Alternating row colours - You can use a different font and background colour for odd and even numbered rows in your data grid. This gives a nicer effect and allows viewers to read the information in rows more easily. Use the Colours tab to choose colours. An example of alternate row colours where the 1st, 3rd, 5th lines are in light blue and the even numbered lines are in white:

Cell text wrap - If the text in a cell is longer than the width of the cell, then you can choose to wrap the text to the next line. You will need 'Auto size rows to fit data' turned on as well.
Auto size rows to fit data - When turn on it will automatically alter the heights of rows where the data doesn't fit into the cell. If you have large text fields in your database and multiple lines of text, then this will resize the rows so that you can see all the text. If you turn this off, then you can use the 'Header row height' and 'Data row height' boxes to manually set the height of header and data rows in pixels.
Vertical scroll bars and horizontal scroll bars - These are set to AUTO HIDE by default as in most cases you don't want to show scroll bars as the viewers of your data grid cannot interact with the grid.
Row separator lines - Use this to put lines between your rows. You can specify the height of the line and also a single colour.
Paging
Depending on how big you have sized your data grid and the heights of columns, etc, the data grid control will show you a number of records in one go, for example 20. If you data base information has more than this number of records, for example 100, then you are not going to be able to see all the records in one go. This is where paging comes in. When you enable paging, the data grid control will split you total records into a number of pages. So for a 20 row data grid with 100 records, you will end up with 5 pages. With paging enabled the data grid control will display the 1st page, then will transition to the 2nd page after a set number of seconds, which can be set on this tab. When it get to the last page then page 1 will automatically be displayed next.
This tab has the following options:
Enable paging - Turns paging on or off.
Delay between pages (seconds) - The number of seconds to display the current page before moving to the next one.
Paging direction - This can be FORWARDS or BACKWARDS. FORWARDS starts at page one and moves forward to page 2, etc. BACKWARDS starts at the last page and moves in reverse.
Page size - This is the number of rows per page. It is important to get this number right. If you set this to 20, for example, and you size your data grid to be able to show 25 rows, then you will still see 20 rows. However, if you resize to show just 10 rows, then you will be missing off the bottom 10 rows per page and your users will not see all of your data.
There is also an optional Paging panel that can be displayed underneath your data grid. This default to saying which page number and then total pages in the format 'Page 1 of 5' but can be customised as you see fit. Click on 'Paging' tab to show, hide or customise this.
Header and footer panels
You can optionally display a header panel above your data grid to display a title and also optional al put a footer panel below you data grid to display additional text there. You can enable these on the 'Header' and 'Footer' tabs. You can always insert your data grid into a presentation and then use our other controls, such as the Picture control, Text block control, Shape control, and Text label controls to build up a customised surround to your data grid.
Preset colours
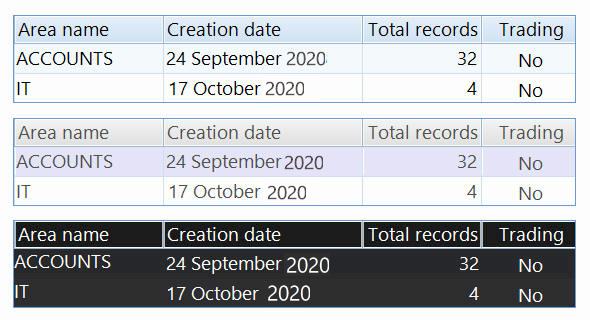
If you use the 'USER SETTINGS' combo, there are few predefined colour schemes for the data grid control:
These are PRESET 01, PRESET 02 and PRESET 03 colour schemes:
Group tab
This allows you to group information together and create groups of records such as:
Other tabs
There are other tabs to help you format this data grid and the data grid columns:
Columns - Lets you set individual properties for each column. This includes width, visibility, header and data alignment, formatting and many more options.
Column header font - Choose which font to display your header text in.
Row font - Choose which font to display your data grid rows in.
Colours - You can set the colours of all the elements in the your data grid.